First, you have to create your LMS account:
a. Go to lms.udutu.com.
b. Click on “Create New LMS Organization” and complete the registration form.
c. You will now have access to your very own LMS.
Note: You should receive a welcome email upon signing up. Please check your junk/spam folder if it doesn’t show up. Otherwise, contact us directly at info@udutu.com and we’ll get you going.
Set up your LMS Administration options:
Log into the Udutu LMS by clicking the link in your welcome email using your email/username, password. In the left hand column, you will see your administration navigation buttons. Click Administration and then click on Organization. Select the Registration Options tab.
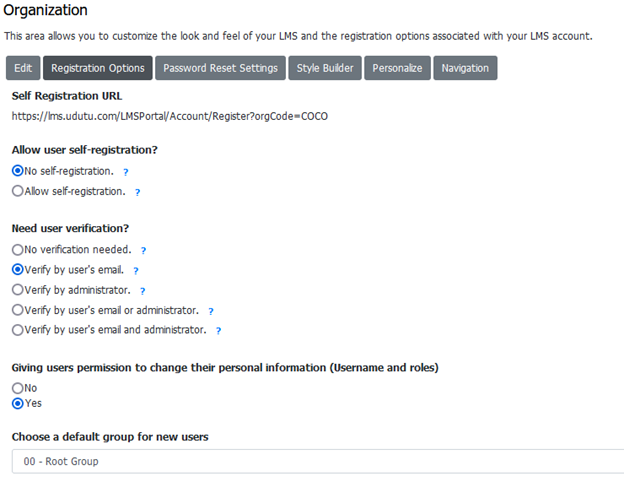
Here you will find the URL to distribute to your learners.
Select your Registration Options, verification options, password options and the default group.
Tip: Rollover the question marks to find out more information on each of the settings.
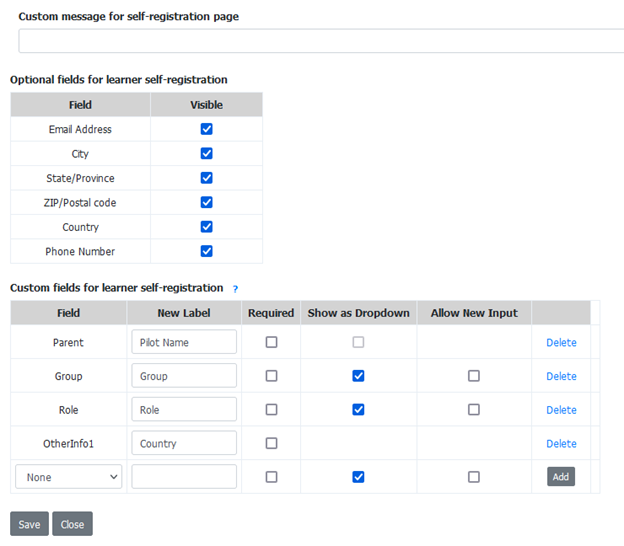
Next pick you registration page options if you are allowing users to self-register. Add any messaging you want displayed, choose which fields you want users to fill in and you can also add custom fields such as Group or Role so learners are automatically grouped correctly in the LMS.
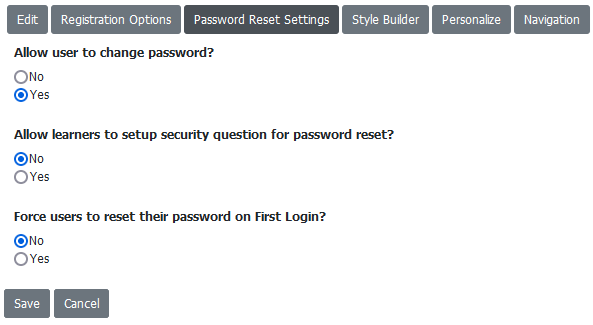
On the next tab, Password Reset Settings, you can select the passwords settings for users in your LMS.
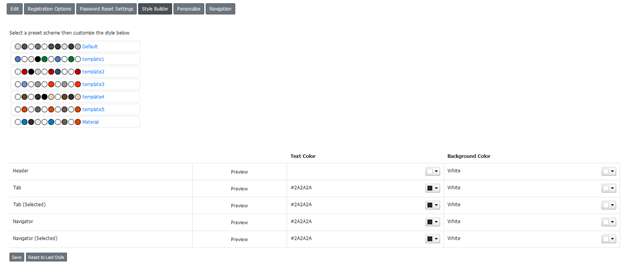
Next, click Style Builder and select a colour scheme closest to your branding. You can then customize each element listed.
Next, click the Personalize and change your home screen image, add your logo and other custom images. Tip: Rollover the magnifying glasses to see what images you are changing.
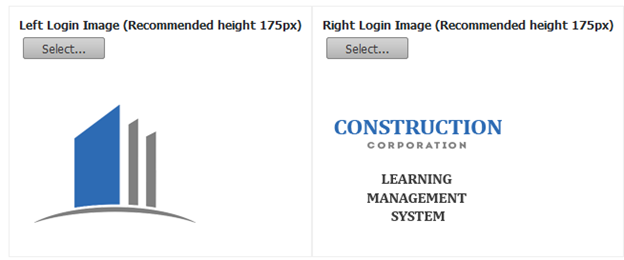
Here you can also add images for your login page.
The Navigation Tab allows you to select the navigation buttons on the left hand side that both the administrators, learners, and other levels of access will see. Deselect any buttons you will not be using. Tip: You can add additional buttons for links to websites and other resources.
Tuition Credits tab is only used if you are selling your courses. More information can be found here. Tip: Remove this button in Navigation if you aren’t planning on selling your courses.
Set up your groups:
You have 3 different grouping options under Category Management; Roles, Groups and Classrooms. Click to find out more about each one.
The most versatile of these is Groups. Groups are hierarchical so you can have groups within groups which can be useful when you are pulling reports. Think carefully about how you want to organize your learners in your LMS. With each group you can select the parent group which will include all the other sub groups within it. Once you’ve added your learners, you can add a group manager who will be able to pull reports and track the training of their specific group. Tip: Create groups of learners that will take the same training.
Tip: The root group is the default parent group for all your groups. Anything assigned to the root group will be assigned to everyone in your LMS.
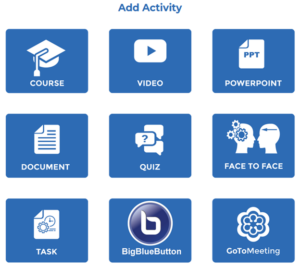
Add your learning activities:
Click Activity Management. Here you will be able to add your learning activities. These can include a variety of activities such as Online Courses, PowerPoint Presentations, Videos Face to Face Sessions and Quizzes.
Add learning activities to the LMS. For detailed information on how to add an activity click here. Note: Be sure to make your activities active if you want them to be made available to your learners!

Once you have added an activity, go back to the Activity Management tab, find your activity, click on it and then click Assign Training. This is where you will give access to the appropriate groups or learners. You can make whole groups learners or, if you click Member Assignments, you can give individual learner(s) within a group access to that activity. Tip: Consider creating Learning Paths, setting up blended curriculums or providing a series of training activities. Find out more information on Learning Paths here.
Add your learners:
Under User Administration you have 2 options to add learners. You can add each learner manually or you can batch upload several learners. Note: If you have selected the self-enrollment option your learners will also be able to enroll themselves.
When you manually add your learners you will need to fill in all the required fields. Remember to select the group that you would like the learner to be in as this will be a primary way to allocate permissions for certain training.
To batch upload your learners download the excel spreadsheet and fill in the information for each learner. The important columns are Username, Password, Last Name, First Name, and Group Code (so your learners are placed in the correct group). Email address is also useful if you want your learners to be able to recover their passwords or if you want to be able to send emails to your learners from the LMS. Tip: Once you have added all your learners you can email them all their usernames and passwords directly from the LMS with the click of a button.

If you are having difficulty setting up your LMS or would like us to do it for you, we offer several different set-up packages to get you up and rolling quickly. Contact info@udutu.com to find out more. Be sure to bookmark our FAQ site as an ever growing resource. Here you will also find our LMS and authoring tool user guides.